Administrative Controller Guide
Complete handbook for curated gifts catalog administration and analytics tracking
1. Overview & Portal Access
Welcome to the Noor Al Hayati Admin Controller Portal. This interface empowers you to manage occasion gift box categories, configure product details including customized pricing options, view recent transaction statuses, and track overall revenue analytics.
🔒 Authentication Credentials
To sign in, click the account icon on the main store page navigation bar or visit https://noor-alhayati.com/shop?auth=login. Enter the admin credentials below:
                        Username: admin@noor-alhayati.com

                        Password: AdminNoor123!
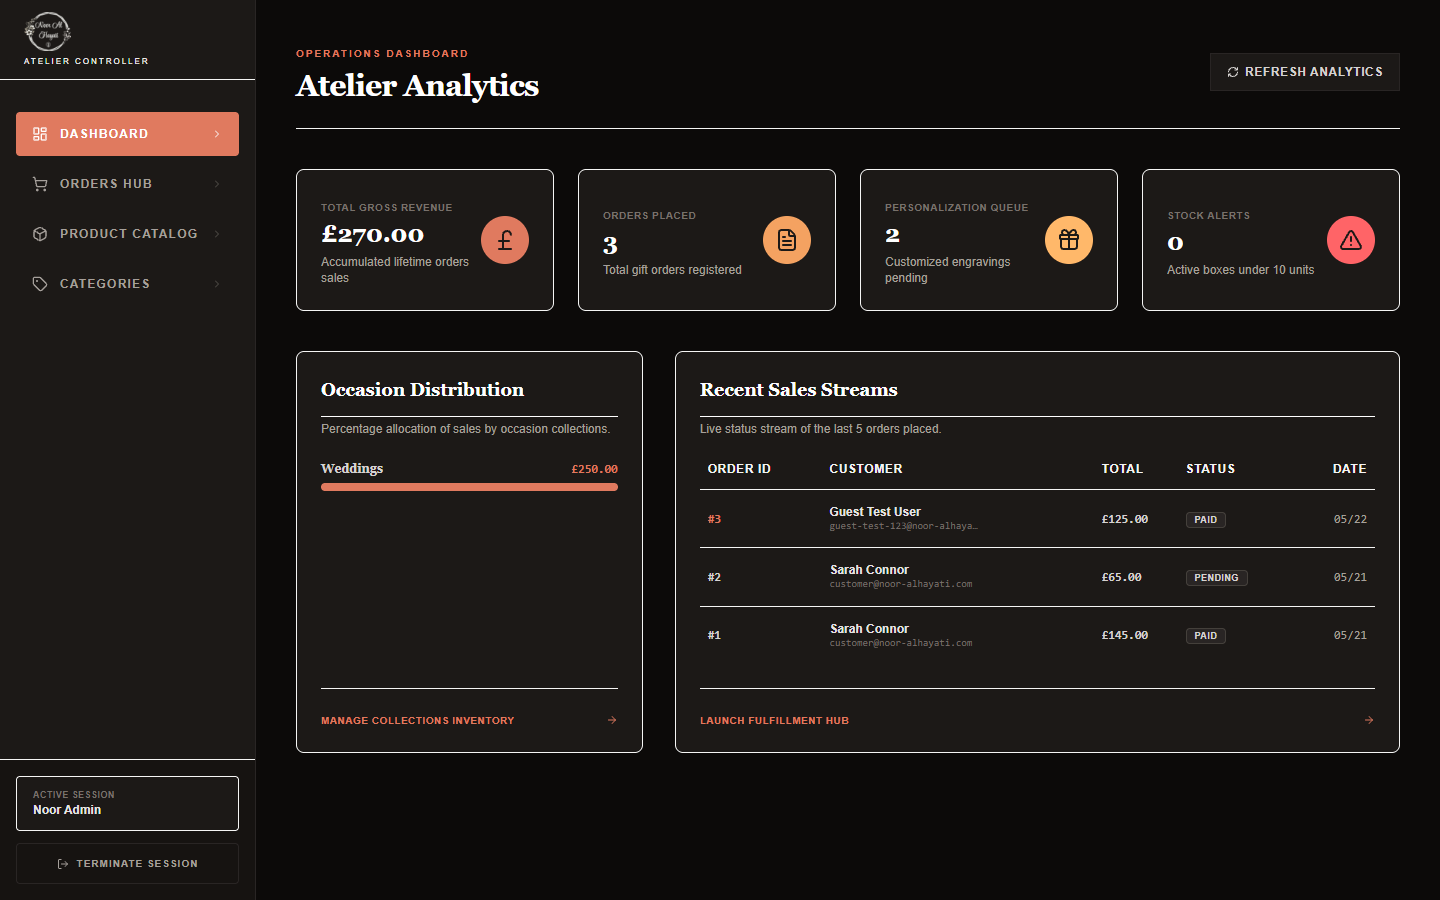
2. Analytics Dashboard Overview
Upon successfully signing in as an admin, you will be redirected automatically to the administrative dashboard dashboard screen. The dashboard gathers real-time boutique stats, sales aggregates, inventory levels, and order streams in one visual hub.
-
1
Key Performance Indicators (KPIs)Four metrics display critical information at a glance: Total Gross Revenue (£) (accrued paid transactions), Orders Placed (total count of customer entries), Personalization Queue (count of customized gift boxes awaiting manual attention), and Stock Alerts (catalogs running dangerously low).
-
2
Occasion Distribution ChartDisplays a percentage and monetary breakdown showing which holiday, event, or themed collection drives the highest client traction.
-
3
Recent Sales StreamA live status stream displaying the 5 most recent orders placed on the storefront. Click on any item to view shipping coordinates.
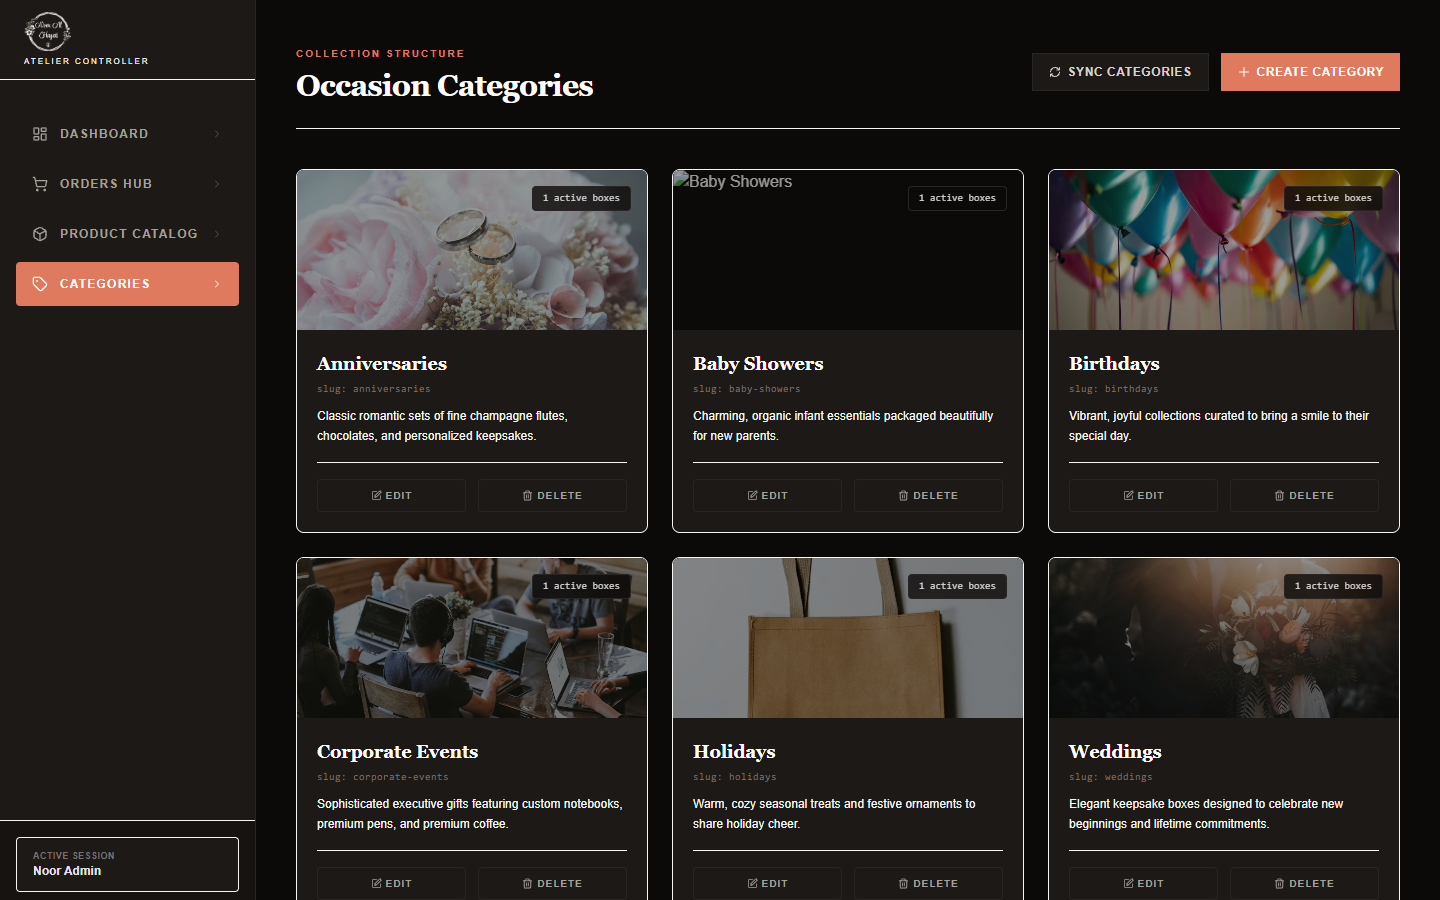
3. Managing Occasion Categories
Categories represent your event collections (e.g. Weddings, Baby Showers, Corporate). Creating separate categories organizes the shop catalog and allows clients to filter boxes by celebration type.
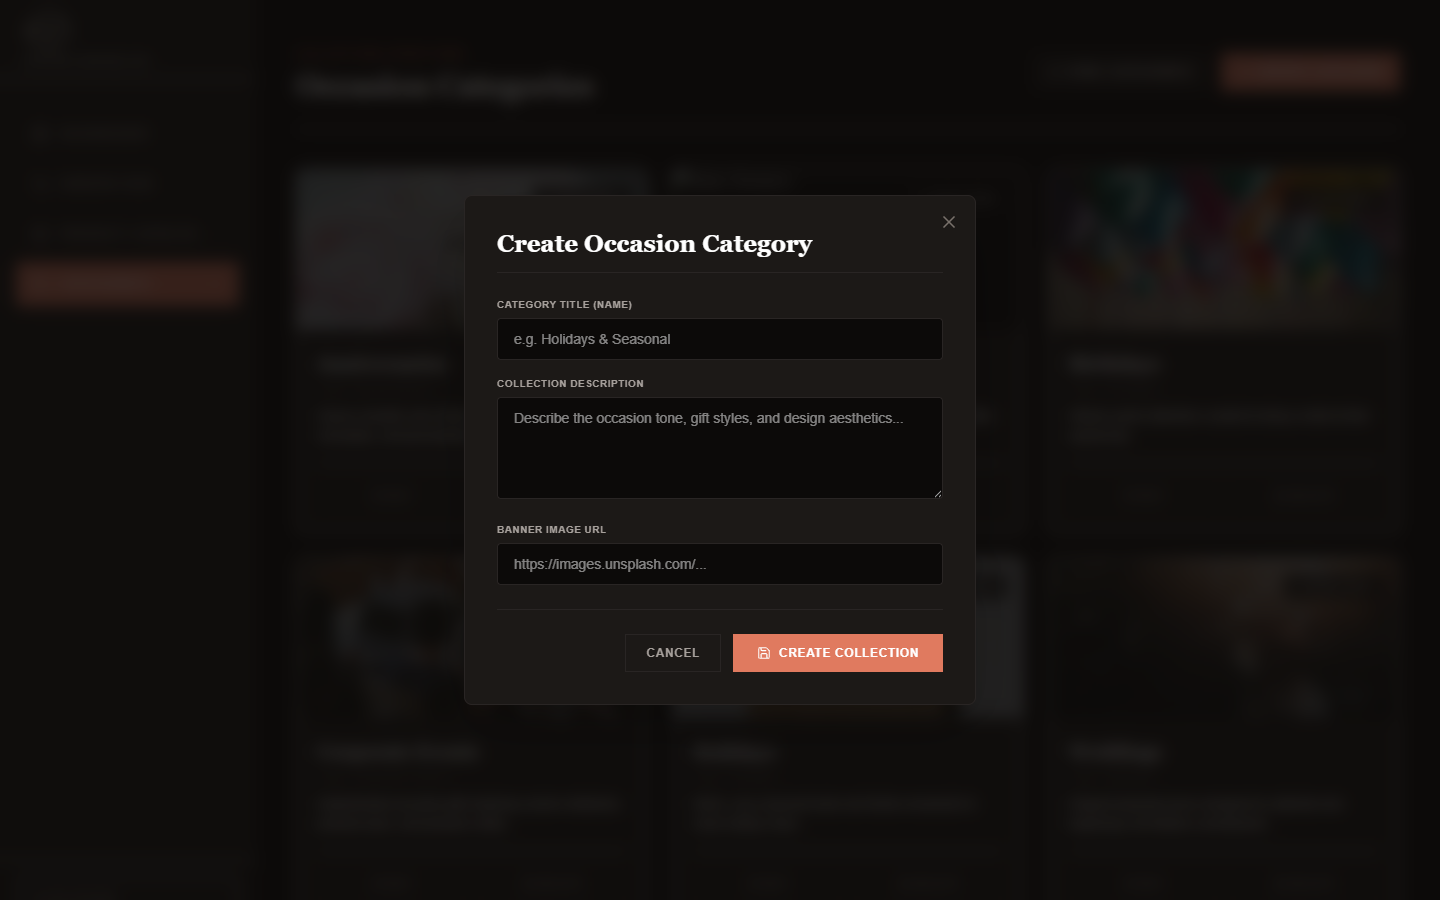
Creating a New Category
-
1
Access Categories StructureClick "Categories" in the sidebar navigation or browse to /admin/categories.
-
2
Launch Create DialogClick the Create Category button in the upper right. This opens the configuration modal.
-
3
Fill Category SpecificationsProvide a Collection Name (e.g. "Anniversaries"), a Detailed Description, and a public Thumbnail Image URL.
Note: The slug path is generated automatically from the name.
Editing an Existing Category
-
1
Locate Target Category CardFrom the Categories grid view, find the card representing the category you wish to adjust.
-
2
Open Edit ModalClick the Edit button in the bottom left of the category card. This launches the modal filled with existing configurations.
-
3
Save ModificationsUpdate the Collection Name, Description, or Banner Image URL as desired, then click the Save Collection button. Slugs are automatically updated based on the new name.
Deleting a Category
-
1
Trigger Delete DialogClick the Delete button in the bottom right of the target category's card.
-
2
Review Cascade WarningsA safety confirmation dialog opens. If there are active products inside the category, it warns you that all associated products will also be deleted (cascade deletion).
-
3
Confirm DeletionIf safe to proceed, click Proceed Delete to remove the category. Otherwise, click Cancel.
⚠️ Safety Warning: Category Cascade Deletion
Deleting a category will prompt a warning dialog if there are products linked to it. Confirming the deletion will also cascade-delete all products associated with that category. Exercise caution.
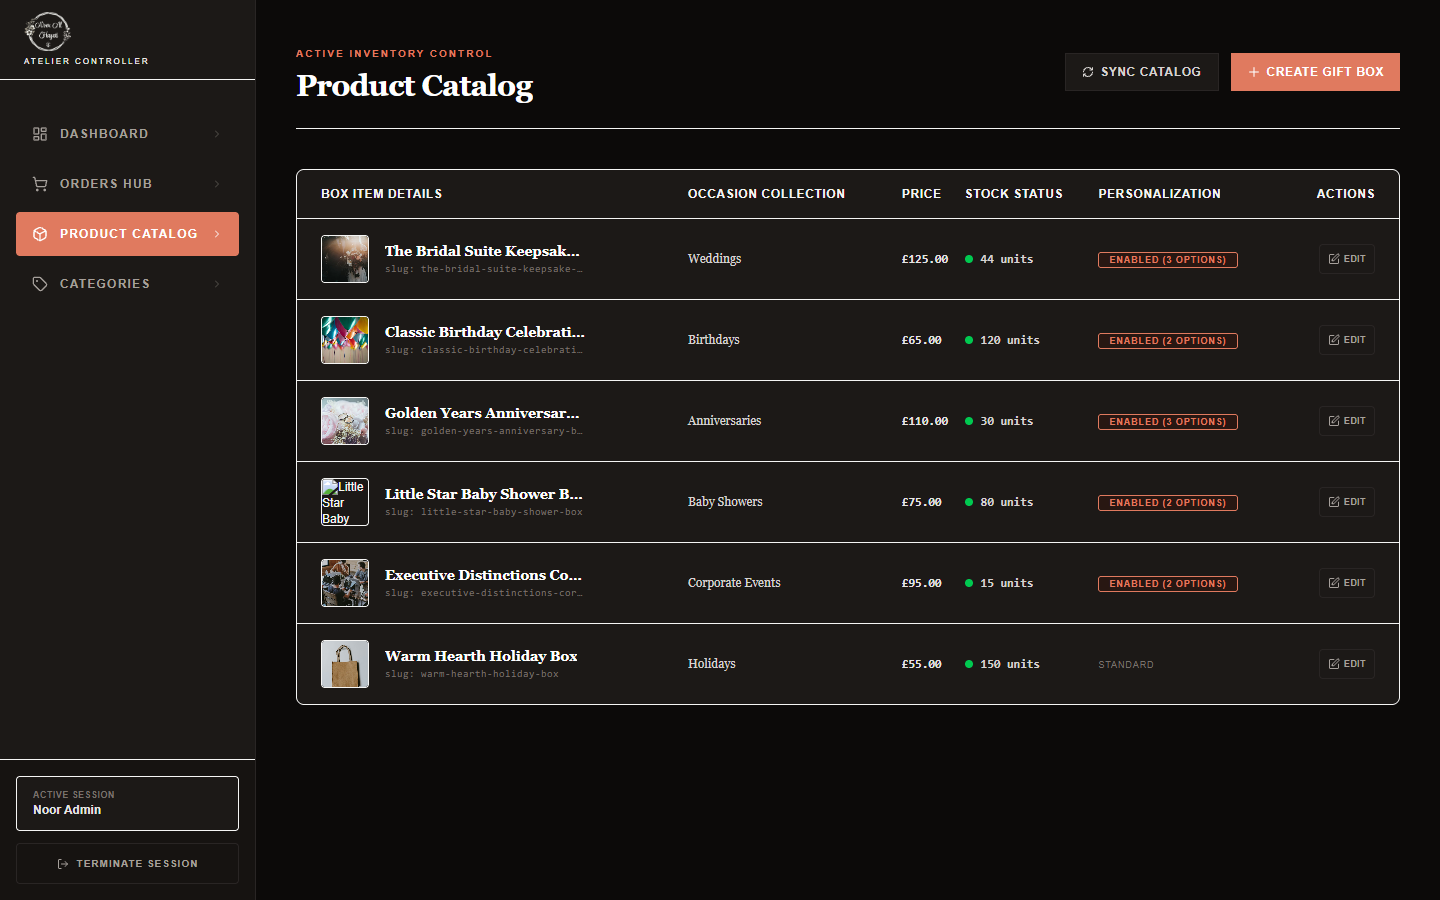
4. Managing Gift Box Catalog
The products catalog is where you configure individual gift boxes, customize their stock metrics, list active prices, and set available personalization modifications.
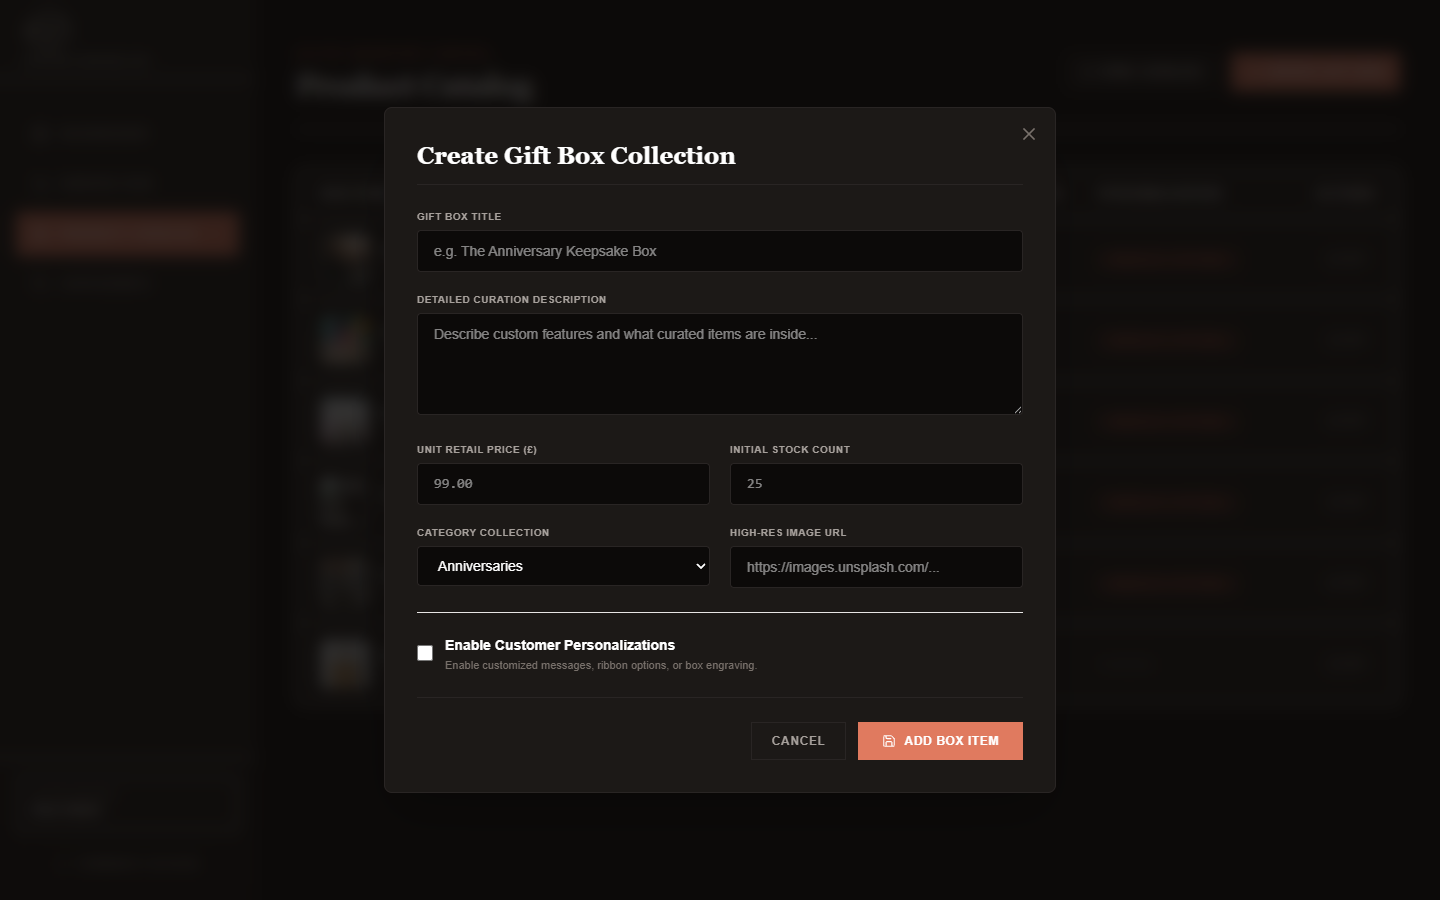
Adding a New Gift Box
-
1
Open Product FormNavigate to /admin/products in the sidebar, and click Create Gift Box.
-
2
Define Base PropertiesEnter the Title, Curation Description (detailing what artisan items are packaged inside), Unit Retail Price (£), initial stock quantity, and assign it to an Occasion Category. Upload or reference a high-quality product image.
-
3
Enable Customizations & Price ModifiersToggle Enable Customer Personalizations to allow specific additions at checkout. You can configure:
- Satin Ribbon Colors (e.g. Soft Pink, Apricot Sand) + Price Modifier
- Solid Wood Lid Engraving (e.g. customized text Mr & Mrs) + Price Modifier
- Handwritten Calligraphy Card Note + Price Modifier
Editing an Existing Gift Box
-
1
Locate Product RowNavigate to the products ledger table and locate the row containing the target gift box.
-
2
Open Product Edit FormClick the Edit button in the rightmost column. The edit dialog opens, prefilled with existing information.
-
3
Adjust Settings & SaveModify any parameter—such as title, description, price, stock, or toggled customizations—and click Save Adjustments.
Deleting a Gift Box
-
1
Launch Deletion Safety CheckClick the Delete button next to Edit on the product row. This triggers a safety confirmation modal.
-
2
Acknowledge ConstraintsIf the product has historical orders associated with it, the database RESTRICT rules will prevent deletion to preserve transactional integrity. In such cases, you will be blocked and advised to set stock count to 0.
-
3
Verify and ProceedFor products with no active customer purchases, click Proceed Delete to permanently remove it from the catalog.
5. Order Streams & Fulfillment
When clients complete payments via the mock checkout flow, the transaction is logged immediately under the administrative orders stream workspace.
-
1
Browse Orders LedgerNavigate to /admin/orders. The listing displays the customer's name, email, checkout date, paid totals (in GBP), transaction status, and shipping coordinates.
-
2
View Customizations specificsAny item that had customizations enabled (e.g., custom engravings or card notes) will display the exact text and ribbon selection chosen by the client alongside the purchased product information. Use this checklist to build and curate the physical gift box.